
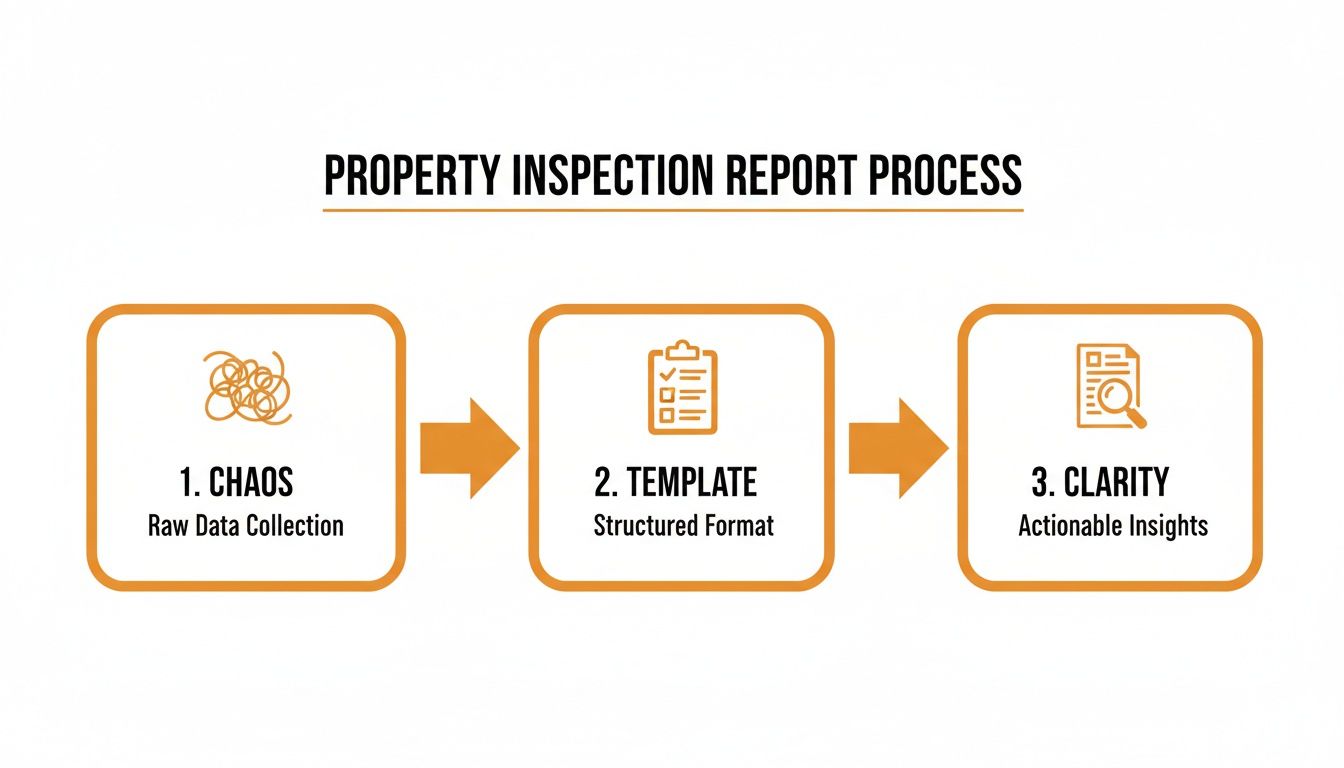
A good property inspection report template isn't just a document—it's the tool that turns messy field notes into a clean, actionable report. A solid, structured format means every detail, from roof measurements to faint water stains, gets captured systematically. The result? A dramatically faster claims process.
Why a Standardized Report Is Your Best Friend in the Field
Trying to manage a complex property claim without a clear framework is a surefire way to create errors and delays. This is where a battle-tested inspection template becomes an adjuster's most valuable asset. It’s the difference between chaos and clarity.
Top insurance carriers and IA firms all rely on standardized formats for one simple reason: consistency equals efficiency. When every report follows the same logical flow, desk adjusters know exactly where to find the info they need, and they can move claims forward without hesitation.
Structure Creates Speed and Accuracy
A template does more than just help you organize your photos and notes. It forces you to be methodical. Instead of just jotting down what you see, you're following a proven sequence, making sure nothing critical gets missed.
This systematic approach is non-negotiable for a few key reasons:
- It Guarantees Accuracy: Think of your template as an interactive checklist. It prompts you to record every necessary measurement, material type, and specific detail about the damage you're seeing.
- It Speeds Up Claim Cycles: A clean, consistent report lets the desk adjuster make decisions fast. This cuts down on the back-and-forth and gets the policyholder paid sooner.
- It Reduces Disputes: When you present facts in an organized way, backed by photos and objective data, there’s less room for argument over the scope of work.
A structured report transforms a jumble of observations from the field into a clear story that a desk adjuster can act on the moment they open it. To make that happen, every report needs to contain the right components.
A high-impact report is built on a foundation of clear, distinct sections. Below is a quick-reference table outlining the essential components that every adjuster should include to ensure their reports are complete, defensible, and easy to process.
Essential Components of a High-Impact Inspection Report
| Component | Purpose | Key Information to Include |
|---|---|---|
| Claim & Property Info | To provide immediate context and identify the claim. | Policy number, insured's name, property address, date of loss, date of inspection. |
| Inspection Summary | To give a high-level overview of the findings. | Brief narrative of the cause of loss, summary of damages, and total scope. |
| Photo Log | To provide visual evidence supporting the scope of work. | Labeled, high-resolution photos of all elevations, damaged areas, and supporting context. |
| Scope of Work / Estimate | To detail the required repairs and associated costs. | Line items for materials and labor, clear measurements, and item descriptions (using software like Xactimate). |
| Diagrams & Measurements | To visually represent the property layout and damage locations. | Roof diagrams (with pitch), interior floor plans, and elevation sketches. |
| Supporting Documents | To include any additional relevant information. | Weather reports, contractor estimates, or signed statements. |
Having these elements organized in a consistent format is the key to producing reports that get approved without unnecessary questions or delays.
A Strong Foundation for Complex Claims
The real value of a great template shines through on the tough jobs. For a steep roof inspection, it guides you to document the pitch, access points, and any safety measures you took. During a storm damage assessment, it helps you separate and detail wind versus hail damage with absolute precision.
A great report doesn't just list what's broken; it tells the story of what happened. It provides the "why" behind your scope, backed by undeniable photos and data.
This professional approach is what carriers expect. In fact, the demand for this level of detail is a huge driver in our industry. The global home inspection services market, which leans heavily on advanced property inspection report templates, was valued at $7.5 billion in 2024 and is on track to hit $12 billion by 2026. This explosive growth comes from the insurance world's demand for better, more standardized documentation. You can dig deeper into this trend and its effect on property assessments with these industry insights.
This guide will break down our downloadable template, showing you how to use it to create reports that are clear, defensible, and built for speed.
A great report is born in the field. The quality of your final paperwork is a direct reflection of how you handle the walkthrough itself. It’s about having a repeatable method that ensures you miss nothing, turning the chaos of a damaged property into a clear, actionable story.
This process starts before you even set foot on-site. The pros never go in blind. Take five minutes to review the claim, understand the reported cause of loss, and pull up a map. Get a feel for the property's layout and any potential access issues. This little bit of prep sets the stage for a much more focused and efficient inspection.
Once you arrive, the real work begins. Your goal is to build a coherent story of the damage, and that story needs a logical beginning, middle, and end. Jumping from a roof leak to a basement window will just create confusion and lead to a report full of holes.
Establishing a Logical Path
You need a system. Always start your inspection from the same point and follow the same sequence. I’ve found that an exterior-to-interior flow works best for just about every situation.
Start with a full walk-around of the property, documenting all four elevations. This gives you a crucial baseline and establishes context before you dive into the specific damage. After the elevations, you head to the primary area of concern—the roof for a storm claim, or inside for a water loss. The key is to follow the evidence methodically.
Tracing Damage to Its Source
Let's talk about a common scenario: a water stain on a living room ceiling. An amateur inspector might just photograph the stain and call it a day. A pro knows that the stain is the effect, not the cause. Your job is to trace that damage back to its origin.
This is how you transform a mess of field notes and photos into a clear narrative that a desk adjuster can understand and act on immediately.
A structured template and a methodical process turn the confusion of a damage site into the clarity needed for a fast, accurate claim. It’s what turns a simple observation into a full-blown investigation.
Here’s how you trace that ceiling stain:
- Document the effect: Get overview, mid-range, and close-up photos of the stain on the living room ceiling.
- Investigate the floor above: Head to the room directly above the stain. Check the flooring, the baseboards, and any nearby plumbing fixtures like a toilet or shower.
- Check the attic: If you don't find a source on the second floor, the attic is your next stop. Look for wet insulation, dark stains on the underside of the roof decking, or signs of a leak from plumbing or an HVAC unit.
- Inspect the roof: If the attic points to an issue with a roof penetration, your final step is to get on the roof (safely!) and find the entry point. It could be a failed flashing, a damaged shingle, or an unsealed vent.
This approach gives you the full story. Your report now says, "The water stain on the living room ceiling is the result of water intrusion through failed pipe flashing on the rear roof slope, which then saturated the attic insulation and drywall below." Now that is a narrative that gets claims approved.
A walkthrough isn't just about seeing damage; it's about understanding the path it took. A complete report connects the dots for the person who has to approve the repairs, leaving no room for questions.
Interior and System Checks
After you've assessed the primary damage, do a quick but systematic walkthrough of the other interior rooms. Even if they look fine, a quick check is essential. Note the condition of the walls, ceilings, floors, and windows in each space. This creates a complete record of the property's pre-existing condition and helps prevent scope arguments later.
While you're inside, perform some basic checks on the major systems:
- Plumbing: Run faucets and flush toilets to check for pressure and any obvious leaks. Don't forget to peek under sinks for any signs of past or present moisture.
- Electrical: Test a few outlets and light switches in different areas. Take a look at the main electrical panel for tripped breakers or any signs of overheating.
- HVAC: If it's safe to do so, run the heat and A/C to confirm they kick on. Note the general condition of the unit and the last service date if it’s visible.
This repeatable methodology ensures you gather every data point you need. Proper organization is crucial, and you can learn more about managing these appointments by checking out our guide on scheduling a property walkthrough. Being systematic is what guarantees your final report is a clear, logical, and defensible account of the property’s condition—and what makes for a smooth and rapid claims process.
Documenting Damage With Unshakable Clarity
Vague notes and blurry photos are the enemies of a fast claim. They invite questions, create delays, and can absolutely lead to denials.
Mastering clear, objective documentation is what separates an amateur from a professional. Your goal should be to create a record so thorough that a desk adjuster can see exactly what you saw without ever leaving their chair.
It all starts with a systematic approach to photography. A single, random photo of damage is nearly useless without context. The best practice, and what we drill into our own inspectors, is the "overview, mid-range, close-up" strategy for every single point of damage you find.

The Three-Photo Rule for Damage
Think of your photos as telling a quick story. The overview shot sets the scene, the mid-range focuses on the problem, and the close-up provides the undeniable proof. Following this simple rule for every item adds tremendous power to your report.
Here’s how it works on the ground:
- Overview Photo: Stand back. Capture the entire elevation, roof slope, or room where the damage is located. This answers the first question: "Where on the property is this?" Think of it as a shot of the entire west-facing roof slope.
- Mid-Range Photo: Now, move closer to show the damage in relation to its immediate surroundings. Frame the specific damaged area, like a 10×10 foot section of shingles showing a cluster of hail hits. This gives critical context.
- Close-Up Photo: This is your money shot. Get right on top of the damage, using a ruler, gauge, or even a coin for scale. This photo proves the size and severity of the impact. It's your evidence.
This method puts every piece of damage in a clear, understandable context, leaving no room for a carrier to second-guess what they're looking at.
Writing Descriptions That Defend Your Scope
Your photos are half the battle; your written notes are the other half. Vague, subjective language gets reports kicked back for clarification, wasting everyone's time.
The key is to be descriptive, factual, and objective. Your notes should read like a scientific observation, not a casual comment.
Let's look at a weak note versus a strong one.
- Weak Note: "Hail damage on roof."
- Strong Note: "Observed 8-10 dime-sized (3/4") hail impacts per 10×10 square on the west-facing slope. Damage is characterized by soft metal bruising on vents and gutters, and asphalt displacement with granule loss on shingles."
The second example is powerful because it's packed with specific, verifiable facts. It tells the reader the quantity, size, location, and character of the damage. This level of detail makes your scope of work self-evident and tough to dispute. This is especially crucial when you need to identify signs of hail damage on a roof, as subtle indicators can make or break a claim.
A well-written note doesn't just state a problem; it proves it with data. It preemptively answers the questions a desk adjuster will ask, which is the secret to a one-touch approval.
Best Practices for Bulletproof Documentation
Beyond the photo strategy and descriptive notes, a few other habits will elevate your reports to the next level. Build these into your workflow, and you'll earn a reputation for unshakable clarity.
Documentation Checklist:
- Label Everything: Don't make anyone guess. Label your photos with the elevation or room (e.g., "West Elevation," "Living Room Ceiling," "Kitchen Sink P-Trap").
- Document Undamaged Areas: If a storm only hit one side of a house, take photos of the undamaged elevations. This proactively shuts down questions about expanding the scope and proves you were thorough.
- Provide Scale in Every Close-Up: This is non-negotiable. Never take a close-up without something to show its size. A ruler is best, but a coin works in a pinch.
- Use a Test Square: For widespread damage like hail or wind, mark off a 10×10 foot test square on each affected slope. Count the impacts within that square to establish a consistent, data-driven basis for your entire estimate.
When you combine this meticulous documentation with a well-structured property inspection report template, you create a truly bulletproof record. That precision cuts down the back-and-forth, justifies your scope, and gets the claim moving faster.
Not all inspections are created equal. Your standard report template is a great foundation, but when you're faced with a high-risk job, it's time to go deeper. A steep-pitch roof, widespread storm damage, or a massive tree impact—these aren't routine. Your documentation needs to evolve to capture the specific details these complex claims demand.
The goal is to prove not just the damage, but the context. A desk adjuster sitting in an office miles away needs to see exactly why a repair is so complex or costly. Your report is the bridge. Your photos and notes are what make the case.
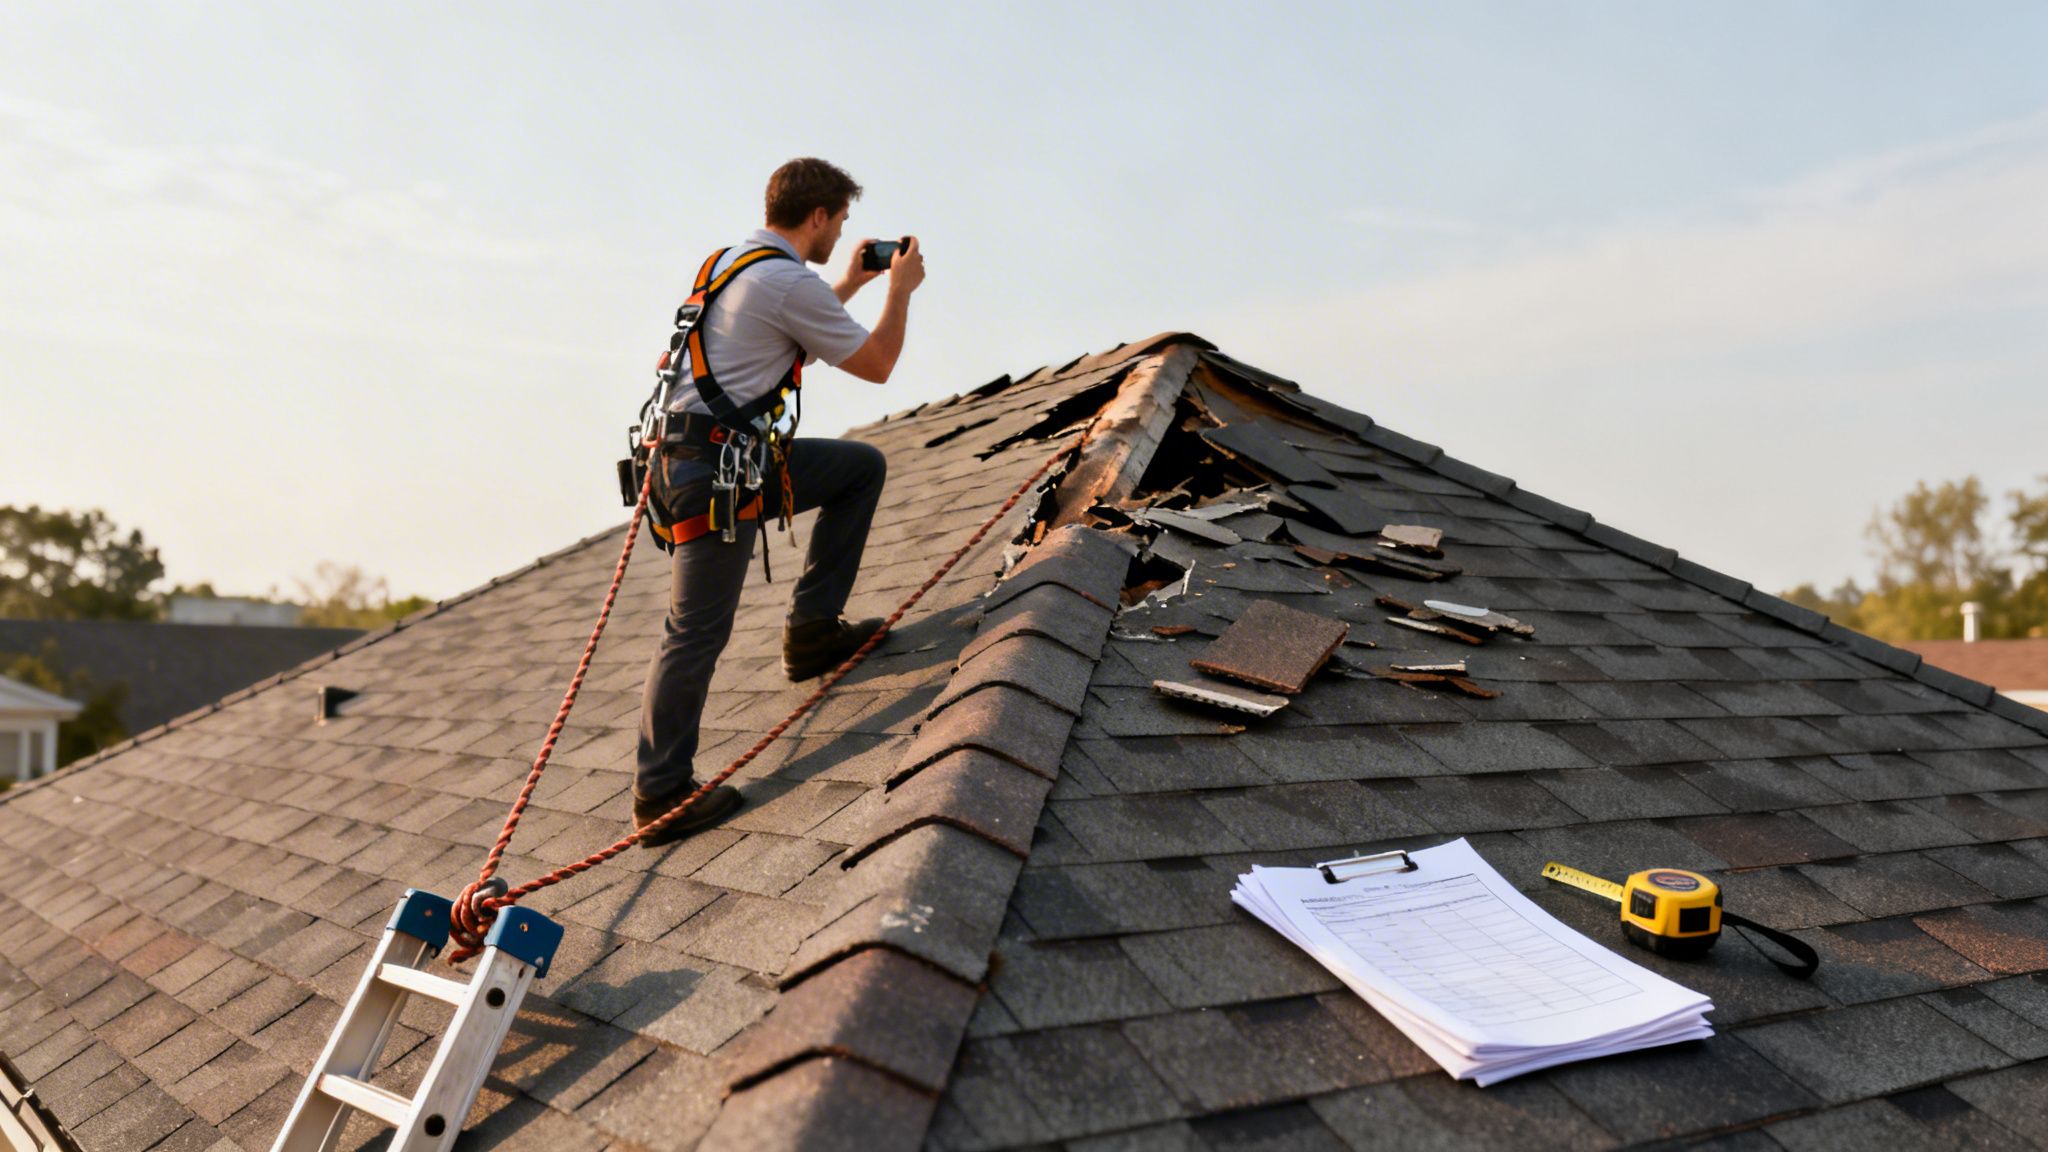
Documenting Steep and Tall Roofs
Inspecting a roof with a 10/12 pitch or steeper is about more than just finding damage. It's about documenting the risk and labor involved. Access alone is a huge cost driver, and your report is your proof.
For these jobs, your photos need to tell a story of access challenges. Go beyond the usual elevation shots.
Key Photos for High-Risk Access:
- Pitch Gauge Shots: Don't just estimate. Lay a pitch gauge flat on multiple roof slopes and snap a clear, readable photo. This is undeniable proof.
- Access Point Photos: Show how you got on the roof. Get a picture of your ladder extended against a two-story wall or any special lift equipment you had to use.
- Safety Gear in Action: Take photos of your harness, ropes, and anchors set up and in use. This visually confirms the high-risk environment and justifies the need for safety protocols during the repair.
These images give the carrier the evidence needed to approve line items for high-steep charges, man-lifts, or additional labor. Your notes should back it up: "Inspection performed on 12/12 pitch roof; full harness and safety rope setup required for access."
Differentiating Wind and Hail Damage
After a big storm, you’ll often find a mix of wind and hail damage. A report that just says "storm damage" is a recipe for delays and questions. You need to be a detective, separating the evidence for each cause of loss.
Think of it as building two distinct cases within one report. One set of photos and notes for hail, another for wind.
Isolating the Damage:
| Damage Type | Evidence to Capture | Sample Note |
|---|---|---|
| Hail Damage | Photos of bruised soft metals (vents, gutters), granule loss on shingles shown with a scale, and impacts on siding or window wraps. | "Observed 7-9 quarter-sized hail impacts per test square on the north slope. Impacts show clear asphalt bruising and granule displacement." |
| Wind Damage | Photos of lifted shingles with visible "creases," completely missing tabs, and damage to ridge caps or vents. Note the direction of the creasing. | "Identified ~30 lifted shingles on the west slope with creasing consistent with wind uplift. 5 tabs are missing entirely from this slope." |
A clear report is a fast report. When you separate wind and hail evidence, you give the desk adjuster two clean narratives, letting them apply the right coverage without having to send it back for clarification.
This level of detail makes all the difference. A single home inspection can save a buyer an average of $14,000 in surprises. In the claims world, that same attention to detail ensures the policyholder gets a fair, accurate, and fast settlement.
Assessing Major Tree Impact Damage
When a tree comes down on a house, the damage is almost never confined to the impact point. Your job is to document the obvious structural hit and the ripple effect of damage that radiates outward. You have to capture the full scope.
Start where the tree hit, using the "overview, mid-range, close-up" photo method to document the breach. Then, follow the trail of destruction.
Documenting the Ripple Effect:
- Structural Framing: Get into the attic or open up walls (if it's safe and you're authorized) to photograph cracked rafters, broken collar ties, or splintered top plates.
- Interior Finishes: Head inside. Look for new cracks in the drywall on ceilings and walls, door frames that are now out of square, and buckled flooring. These are all signs the structure has been twisted.
- Systems Damage: Don't forget to check for compromised electrical wiring, crushed HVAC ducts, or broken plumbing lines that were in the tree's path.
Your report must tie all these seemingly separate issues back to the single event. A note could read, "Impact from the oak tree on the rear roof slope fractured three primary rafters. This has resulted in a visible ceiling crack in the master bedroom and has torqued the frame, making the rear entry door inoperable." This kind of narrative leaves no doubt about the true scope of work required.
Navigating Claims Processing and Legal Hurdles
Your completed inspection report is more than a summary of damages—it's a critical financial document. The moment you submit it, you're creating a permanent record that will be scrutinized by claims adjusters, attorneys, and sometimes even a jury.
How you write that report directly impacts claim speed, the final settlement, and your own professional credibility.
The single most important rule? Stick to the facts. Your job is to document what you can see, measure, and test. That's it. Never offer assumptions or opinions about why something happened. Speculation is the fastest way to get your report torn apart and create massive problems for the claim.
Your Report is the Desk Adjuster's Best Friend
Think of a well-documented report as the adjuster's most important tool. It gives them the clear, objective evidence they need to justify their decisions to both the policyholder and their own supervisors.
When your photos, measurements, and descriptions are rock-solid, a desk adjuster can confidently approve the scope of work and get the payment process moving. This is especially true on complex files where your detailed evidence can build the foundation for subrogation—where the carrier seeks to recover costs from a third party who was actually at fault.
The purpose of your report isn't to win an argument; it's to present facts so clearly that no argument is necessary. A defensible report is objective, verifiable, and free of speculation.
This standardized, factual approach is the backbone of the entire home services industry. In fact, the U.S. home inspection sector, which leans heavily on formats like a property inspection report template, brings in over $4 billion annually. This just shows the immense value placed on clear, consistent documentation in both real estate and insurance. You can dig deeper into these trends with these home inspection statistics.
Mitigate Your Risk with Objective Language
Words matter. The right phrasing can mean the difference between a quick, clean approval and a drawn-out legal battle. It's absolutely crucial to write in a way that is factual and avoids any language that implies fault or guarantees an outcome.
Here’s a look at risky phrasing versus safe, factual language:
| Risky Phrasing (Avoid) | Safe, Factual Phrasing (Use) |
|---|---|
| "The contractor's poor work caused the leak." | "Observed unsealed nail penetrations around the pipe flashing." |
| "The roof is definitely totaled and needs full replacement." | "Observed widespread, consistent hail impacts across all slopes, numbering 10+ per square." |
| "This old wiring is a fire hazard waiting to happen." | "Observed cloth-sheathed wiring with brittle insulation at the main panel." |
The "safe" examples are powerful because they are provable facts. They let the desk adjuster, engineer, or attorney draw their own conclusions without being swayed by your opinion. For those trying to make sense of a complex claim, professional insurance claims assistance can be incredibly valuable for interpreting these technical reports.
Ultimately, a clear, template-driven report cuts down claim cycle times dramatically. By presenting unambiguous evidence, you eliminate the back-and-forth between the field and the office—the single biggest source of delays. This efficiency doesn't just make for happier policyholders; it significantly lowers the risk of litigation for everyone involved.
Common Questions on Property Inspection Reports
When it comes to property inspections, questions pop up all the time. Whether you're an adjuster in the office, a contractor in the field, or a homeowner trying to make sense of it all, getting clear answers is crucial. Here’s what we hear most often about getting a property inspection report template right.
How Much Detail Is Too Much in an Inspection Report?
Your report needs to be thorough enough for a desk adjuster to see exactly what you saw, without ever having to pick up the phone and ask for more info. If you’ve anticipated their questions, you’ve nailed it.
Document every single bit of damage you find with photos, measurements, and objective notes. Don't just write "The roof is old." That tells nobody anything useful.
Instead, a pro writes: "Observed 25-year architectural shingles with extensive granular loss, 15+ lifted tabs per square, and widespread thermal cracking." One is a vague opinion; the other is a set of actionable facts. That's the difference.
What Are the Most Common Mistakes to Avoid?
We see the same mistakes over and over: blurry photos, no overview shots to give context, and lazy descriptions like "water damage." Missing measurements are another huge one that can stop a claim dead in its tracks. You can't write an accurate estimate without precise dimensions.
But one of the biggest errors is forgetting to document and photograph the areas with 'no damage.' It might seem counterintuitive, but it's a critical step that prevents scope arguments down the road. Always label your photos clearly and fill out every field in your report. An incomplete report kills credibility instantly.
How Does a Digital Template Accelerate the Claims Cycle?
Going digital is a game-changer for efficiency. It means you can input data right on-site with a tablet or phone, embedding photos directly into your report as you take them. This alone cuts out hours of admin work back in the office.
The real win is speed. A completed digital report can be sent from the field to the claims desk in minutes, not days. This lets the internal team start their review and estimating work almost immediately, which dramatically shrinks the time it takes to get repairs approved and policyholders paid.
Can I Use This Template for Both Residential and Commercial Properties?
Absolutely. This template is a solid starting point for both residential and commercial jobs. The core work—clear documentation, systematic evaluation, and objective reporting—is the same no matter the building.
However, commercial properties almost always need a few extra, specialized sections. You’ll want to customize the template by adding modules for systems you don't typically find in a house.
- Commercial Roofing Systems: Add sections for TPO, EPDM, or built-up roofing.
- Specialized Equipment: Include fields for commercial-grade HVAC, fire suppression systems, or elevators.
- Compliance: Add checks for things like ADA accessibility or other commercial building codes.
Think of this property inspection report template as your reliable base camp. From there, build it out to fit the unique needs of the commercial property you’re inspecting. It’s all about capturing every necessary detail without having to reinvent the wheel.
When you're facing a complex claim on a steep roof, after a major storm, or from a tree impact, you need more than just an inspector—you need an expert partner. Fox Claims Consultants LLC provides the specialized field services that carriers, adjusters, and contractors rely on for fast, accurate, and safe inspections. Get the documentation you need to move claims forward confidently by visiting https://foxclaimsconsultants.com.
Leave a Reply