
After the winds die down and the rain finally stops, your first instinct might be to climb up and see the damage for yourself. Don't.
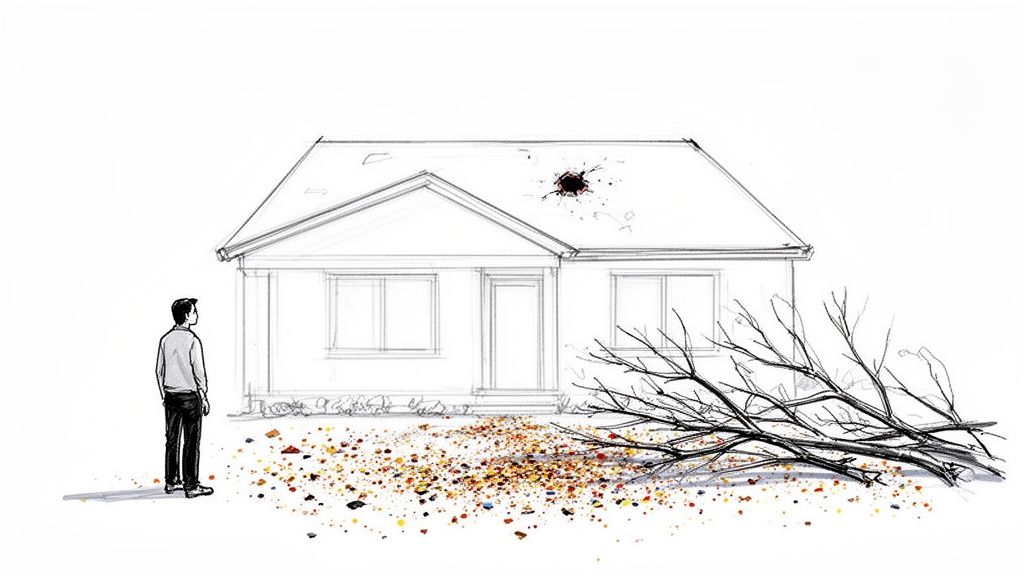
A proper storm damage roof inspection starts safely on the ground. Your absolute first priorities are personal safety and spotting immediate threats from your yard—think downed power lines, dangling tree limbs, or obvious structural collapse. This initial walk-around is a triage, and it dictates everything you do next.
Your First Steps After The Storm
That window of time right after a storm is critical. Before you even think about calling your insurance carrier, your focus has to be on safety and a quick, smart assessment from the ground.
Resist the urge to get on the roof. It’s a dangerous impulse. A compromised roof structure, slick surfaces, or unseen electrical hazards can turn a quick look into a life-altering accident.
Your first and most important task is a simple walk-around.
Conduct A Ground-Level Assessment
Circle your property slowly. You’re not trying to write a detailed scope of work here; you’re looking for the big, glaring red flags that signal serious trouble.
Keep an eye out for these tell-tale signs:
- Debris on the Roof: A large branch isn't just an eyesore. It could mean punctures or even structural damage underneath.
- Missing or Damaged Shingles: Look for obvious gaps where shingles are gone. Also, spot any that are curled, torn, or clearly lifted by the wind.
- Granule Loss: Check your gutters and the ground near your downspouts. If you see a buildup of black, sand-like material, those are the protective granules from your shingles. Heavy loss means your roof’s lifespan just took a major hit from hail or intense rain.
- Damaged Flashing and Vents: Pay close attention to the metal bits. Are the vents dented? Is the flashing around your chimney or skylights peeled back or missing? Wind can easily compromise these critical seals.
This first look from the ground gives you a crucial baseline. As you're documenting what you see, having a fully charged phone is non-negotiable for taking photos and making calls. It’s why we always recommend keeping a reliable portable phone charger in your home's emergency kit.
To help you prioritize, we've put together a quick triage checklist. Use it to make sense of what you're seeing from the safety of your yard.
Initial Storm Damage Triage Checklist
| Observation from Ground | Severity Level | Recommended Immediate Action |
|---|---|---|
| Large holes in the roof; water actively pouring inside. | Critical | Call a professional roofer for emergency tarping immediately. |
| Significant number of missing shingles across the roof. | High | Contact a claims expert or roofer for a full inspection within 24-48 hours. |
| Dented gutters, vents, or a lot of granules on the ground. | Moderate | Document with photos. Schedule a professional inspection. No immediate rush unless leaks are present. |
| A few loose or damaged shingles; minor debris. | Low | Take pictures for your records. Monitor for leaks and plan for a future professional assessment. |
This checklist isn't exhaustive, but it gives you a framework for making smart, safe decisions in a stressful moment.
The Importance Of Acting Quickly
The scale of post-storm damage across the country is staggering. Data shows that a whopping 70% of all roof-related insurance claims are filed right after severe weather events.
With over 6.8 million properties in the U.S. impacted by damaging hail alone each year, you're not the only one making a call. Acting fast matters. Documenting damage within 24-48 hours can significantly improve your claim outcome.
The simple visual guide below breaks down the right way to respond.
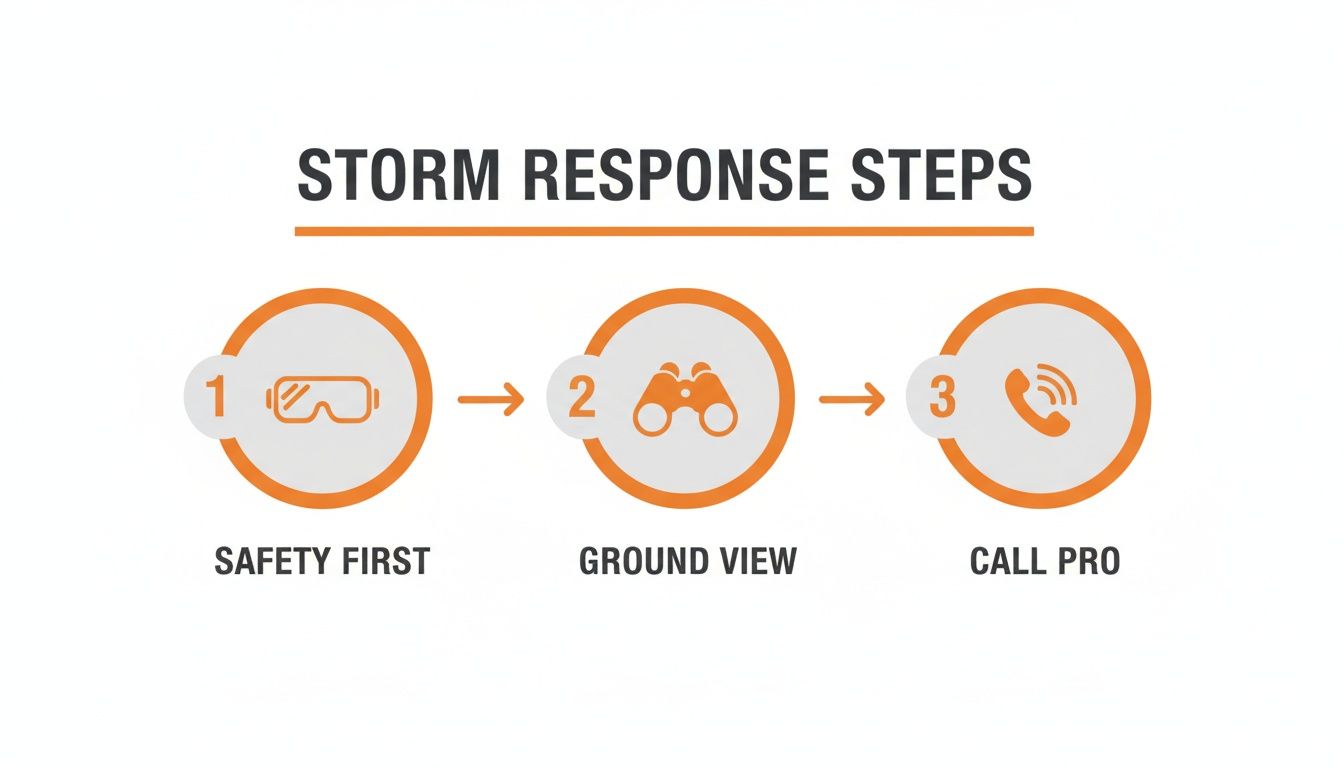
Notice that calling a professional is the final step—after you've prioritized safety and gathered your initial evidence from the ground.
Key Takeaway: Your ground-level inspection is a triage tool. It tells you whether you need emergency services now (like tarping a major leak) or if you can move on to scheduling a detailed, professional storm damage roof inspection.
A Guide To Inspecting Your Roof's Exterior
Once you've cleared any hazards on the ground, it's time to get up on the roof. This is where a real storm damage roof inspection moves from a general overview to a detailed analysis of the surface itself.
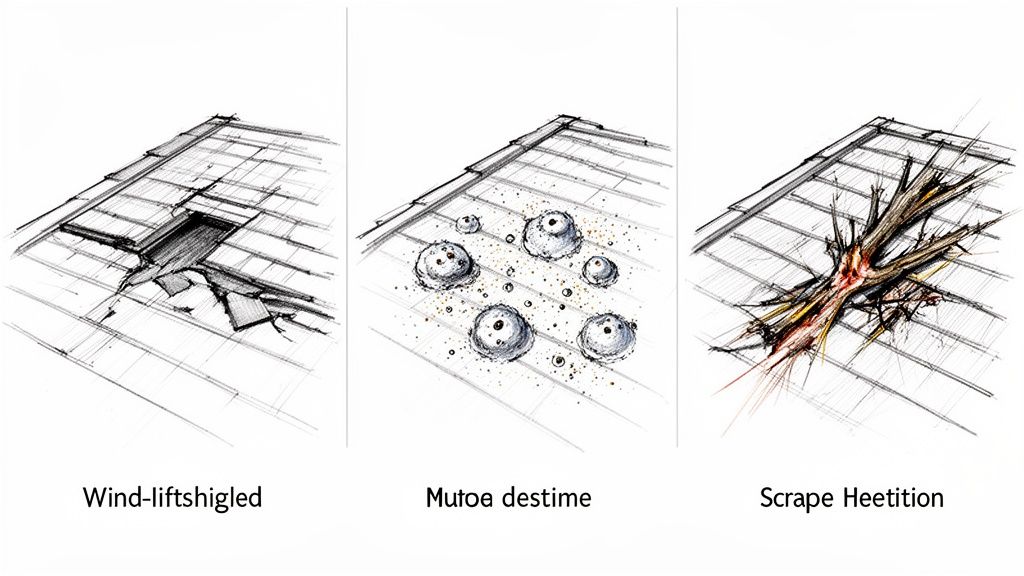
A trained inspector doesn't just count missing shingles. They read the story the storm left behind, identifying the specific signatures that point directly to wind, hail, or debris impact. Knowing the difference is everything—each type of damage weakens your roof in its own way, and getting the diagnosis right is the foundation of a solid insurance claim.
How To Identify Wind Damage
High winds attack a roof with more than just brute force. A completely torn-off shingle is obvious, but the subtle damage is often more critical. Wind doesn't just rip; it lifts, bends, and breaks the adhesive seal that keeps shingles locked down.
Keep an eye out for these key indicators of wind damage:
- Lifted Shingles: From a distance, they might look fine. But up close, you’ll see the seal holding them flat is broken. The edges will be slightly raised or even curled up.
- Creased Shingles: When wind forces a shingle back far enough, it creates a distinct horizontal fold line. That crease is a permanent weak point that will eventually crack and fail.
- Missing Shingles: This is the easiest sign to spot. Pay special attention to the hips and ridges of the roof, as these high-pressure zones are the most vulnerable to wind uplift.
A shingle with a broken seal is a ticking time bomb. It's no longer doing its job and is first in line to be torn off in the next storm. For a truly professional inspection, precision tools are a must. Using something like a quality aluminum I-beam level ensures every measurement is dead-on, which is critical for documenting slope and dimensions correctly in the claim file.
Spotting The Telltale Signs Of Hail
Hail damage is a completely different animal. Instead of tearing and lifting, hail impacts pummel the surface, leaving behind bruises and fractures. It can be surprisingly hard to spot, especially in harsh overhead light. Pros will often inspect a roof at different times of the day, using the changing shadows to reveal subtle indentations.
Hail leaves its own distinct signature:
- Bruises or Dents: On asphalt shingles, a hail hit looks like a dark, bruised spot. That's where the impact has knocked the protective granules clean off, exposing the matting underneath.
- Circular Cracking: You might see a circular or "bullseye" pattern of cracks spreading out from the point of impact.
- Granule Loss: As you probably noticed from the ground, heavy granule loss is a major red flag. Up on the roof, you'll see the bald spots left behind.
- Impact Marks on Metal: Soft metal components like vents, flashing, and gutters are the easiest place to confirm hail. They'll have obvious, undeniable dents.
It's important to know that not all hail damage looks the same. The size and density of the hailstones create different patterns. A seasoned inspector knows how to tell the difference between a legitimate hail strike and other issues like blistering or simple wear and tear.
A key part of a hail inspection is running a hand gently over the shingle. A true hail hit will often feel soft and spongy, like a bruise on an apple. That's because the impact has fractured the fiberglass mat below the surface.
Recognizing Debris And Impact Damage
The third major category of storm damage comes from falling objects—usually tree limbs, but any heavy, wind-driven debris will do. This damage is typically more localized but can be incredibly severe, often causing immediate structural problems.
Unlike the widespread patterns left by wind or hail, impact damage is usually focused on one or two areas.
Common Debris Impact Signatures
| Damage Type | Description | What It Means for Your Roof |
|---|---|---|
| Punctures | A hole that goes completely through the shingle and potentially the roof decking. | This is a direct pipeline for water intrusion and requires an immediate temp repair. |
| Scrapes & Gouges | Deep scratches where a branch has dragged across the roof surface. | This strips away the protective granules and weakens the shingle, speeding up failure. |
| Cracks | A heavy impact can cause linear cracks in asphalt shingles or even split wood shakes. | These cracks let water seep underneath, leading to rot and leaks down the road. |
During a proper storm damage roof inspection, you have to look beyond the obvious hole. A pro will trace the path of the debris, looking for secondary scrape marks or smaller cracked shingles nearby. Every piece of evidence helps build a complete, undeniable picture for the insurance carrier, ensuring the final repair addresses the full scope of the problem.
How To Find Hidden And Interior Damage
A proper storm damage roof inspection goes deeper than what you can see from the curb. The most destructive—and expensive—problems often start small and stay hidden. Water is notorious for traveling, meaning a tiny breach on your roof can silently cause massive damage to your home’s structure long before a drip ever appears on your ceiling.
This is exactly why a thorough interior check is non-negotiable. Shifting your focus from the shingles to your attic and living spaces is how you connect the dots. This internal investigation is what separates a quick look-over from a professional assessment that actually protects your property.
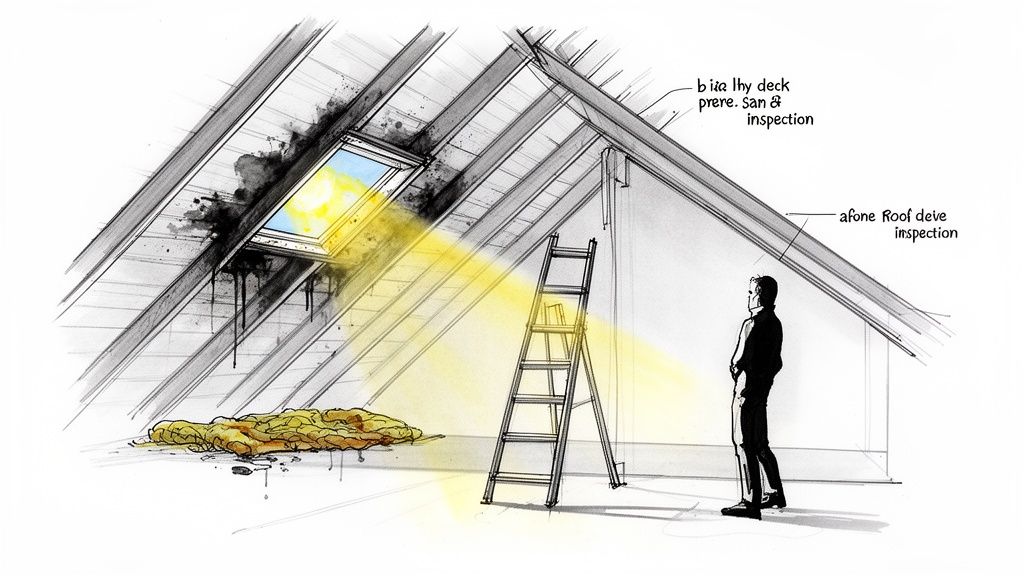
Your Attic: The First Line of Defense
The attic is ground zero for catching water intrusion before it can wreck drywall, flooring, and everything you own. Think of it as the buffer zone between your roof and your home; it holds all the earliest clues. For this, you just need a good flashlight and a careful eye.
Once you’re safely inside the attic, kill the flashlight and let your eyes adjust. Look up toward the roof deck. See any pinpricks of daylight shining through? Even a sliver of light means there’s a direct path for water, whether from a nail that's popped up or a small puncture from debris.
Now, turn the flashlight back on and methodically scan the underside of the roof deck and the wooden rafters. You're looking for a few key things:
- Dark Stains or Streaks: Water leaves a trail. Look for dark, discolored paths running down rafters or across the plywood decking. These stains are the clearest evidence of an active or recent leak.
- Damp or Compressed Insulation: Your insulation should be light and fluffy. Feel it in a few spots, especially below vents or anywhere you noticed damage on the outside. If it feels wet, clumpy, or compressed, water has gotten in.
- Mold or Mildew: A musty smell the second you enter the attic is a huge red flag. Scan for any black, green, or white spots on the wood surfaces or insulation—a sure sign of a long-term moisture problem.
Expert Insight: Remember, water doesn’t always drip straight down. It can run sideways along rafters and sheathing for several feet before it finally pools or soaks through. Always trace water stains back to their highest point to find the likely source of the leak.
Connecting Exterior Damage To Interior Signs
The hidden damage brewing just beneath your roof's surface is one of the most underestimated threats we see. A seemingly minor 20% loss of shingle granules can slash that shingle's lifespan by up to 60%. Even more concerning are microfractures—tiny cracks you can't see that expand by up to 300% during freeze-thaw cycles. These vulnerabilities turn minor storm events into major structural headaches.
It’s why professional inspections catch up to 50% more issues than a typical homeowner assessment and why using infrared technology is 35% more accurate at detecting hidden water. To see the data for yourself, you can read the full research on roof vulnerabilities at GraduateContracting.com.
This is why looking inside is so critical. A small patch of granule loss on the roof might not look like much, but a corresponding damp spot in the attic tells you the shingle’s integrity is gone and water is already getting through. The interior evidence confirms the severity of the exterior damage.
Checking Your Living Spaces For Clues
By the time signs of storm damage appear in your main living areas, the problem has likely been going on for a while. It means water has already saturated the attic space and is now working its way into your home's finished surfaces.
Walk through every room in your house, but pay special attention to the ceilings and the top corners of walls on your uppermost floor.
Interior Damage Checklist
- Ceiling Stains: Keep an eye out for yellowish or brown circles on the ceiling. These are classic signs of a slow leak that has soaked the drywall from above.
- Peeling or Bubbling Paint: When moisture gets behind drywall, it causes the paint to lose its grip. This leads to bubbles, blisters, or peeling, often right where the walls meet the ceiling.
- Drips or Active Leaks: This one is obvious but critical. If you see water actively dripping, get a bucket under it immediately to minimize damage and call for emergency service. Make a note of the exact location for the inspector.
Finding any of these interior signs means your need for a professional storm damage roof inspection is now urgent. It’s no longer a question of if you have a problem, but of finding out how bad it is before it gets any worse.
Documenting Damage For Your Insurance Claim
After the storm passes, your most important tool isn’t a hammer—it’s your phone’s camera. Solid documentation is the foundation of every successful insurance claim, turning your firsthand observations into undeniable proof.
A few blurry, random pictures won’t convince anyone. You need to build a detailed photo log that tells a clear and complete story for the insurance adjuster, who might be hundreds of miles away and has never seen your property. Your job is to remove all doubt.
Mastering Your Photo Documentation
Think like an investigator. Every photo you take needs a purpose—to provide context, show detail, or establish scale. A jumbled collection of images only creates confusion, but a structured set of photos builds a powerful case.
Start wide, then zoom in.
First, take overview shots from the ground, capturing each side of your house from a distance. This shows the entire roof slope and gives the adjuster a baseline to work from. These wide shots help them get oriented and understand exactly where the specific damage is located.
Next, get close-ups of every single point of damage you can safely see. When you photograph a hail impact, a lifted shingle, or a puncture from debris, put a coin or a tape measure right next to it. This provides an immediate, unarguable sense of scale. It’s the difference between "some hail marks" and "1.75-inch hail impacts that have fractured the shingles."
Finally, connect the dots between the outside and the inside. Take a photo of a damaged area on your roof, then go straight into your attic or the room below. Photograph the corresponding water stain on the ceiling, the damp insulation, or the drip marks on the rafters. This directly links the exterior breach to the interior damage, proving the problem is active and ongoing.
Remember to be thorough and organized. Labeling your photos by location (e.g., "North Slope – Missing Shingles," "Attic – Rafter Leak") makes the evidence much easier for an adjuster to process and accept. A small notebook can be a great asset here; you can explore options like these handy mini pocket notebooks to keep your notes organized right from the start.
The Critical Role Of Temporary Repairs
While you’re busy documenting, you also have a duty to stop the problem from getting worse. This is known in the industry as mitigating damages, and it's a standard requirement in almost every insurance policy.
This is where smart, temporary repairs come in. But there's a right way and a wrong way to go about it. The goal is to protect your home from more rain and wind without destroying the evidence you just carefully photographed. Never, ever make permanent repairs before your adjuster has inspected the property and approved the work. Doing so can seriously compromise your claim, as the insurance company could argue they were never able to verify the original scope of damage.
The table below breaks down what to do—and what not to do—when making emergency repairs.
Essential vs. Damaging Emergency Repairs
This isn't just about fixing a leak; it's about protecting your property and your claim at the same time. Acting responsibly proves to the carrier you're serious about managing the situation, but acting too hastily can backfire.
| Action | Do This (Mitigates Loss) | Don't Do This (Compromises Claim) |
|---|---|---|
| Covering Holes | Place a tarp securely over the damaged area to keep rain out. | Permanently patch the hole with new materials or sealants. |
| Handling Debris | Remove a large fallen branch from the roof if it poses a further threat. | Discard the branch or cut it into small, unrecognizable pieces. |
| Interior Leaks | Place buckets to catch water and move valuable items out of the way. | Tear out stained drywall or wet insulation before it's been inspected. |
| Professional Help | Call a professional for emergency tarping or board-up services. | Hire a contractor to begin a full roof replacement without approval. |
Making smart temporary repairs shows the insurance carrier you’re a responsible property owner. It demonstrates you’ve taken the right steps to stop the bleeding while preserving the scene for a fair and accurate storm damage roof inspection and settlement.
Your meticulous documentation, paired with responsible mitigation, creates a powerful one-two punch that protects both your property and your financial recovery.
Knowing When to Call for a Professional Inspection
A walk-around self-assessment is a good start, but it has its limits. Knowing when to put down the binoculars and pick up the phone for a professional storm damage roof inspection is what protects your property and sets you up for a fair insurance outcome.
Some situations just demand an expert eye, plain and simple.
If you’re looking at a multi-story home or a roof with a steep, unforgiving pitch, a DIY inspection is a non-starter. The risk of a fall is just too high. Professionals have the safety gear and training to navigate these structures correctly.
Likewise, if your inspection from the ground turns up obvious, widespread damage—like whole sections of missing shingles, large punctures from debris, or clear sagging in the roofline—it’s time to call for backup. What looks like a few separate issues can often signal a much larger, systemic failure that only a trained inspector can properly diagnose.
The Value of an Unbiased Expert
When the stakes are high, you need more than just a roofer’s opinion. You need an unbiased, third-party assessment.
An independent inspection partner, like Fox Claims, isn’t trying to sell you a new roof. Our only job is to accurately and meticulously document the true condition of your property for everyone involved.
This independent documentation is your single source of truth.
- It builds trust between you, your contractor, and the insurance carrier.
- It speeds up the claim because adjusters get clear, professionally formatted evidence.
- It ensures nothing gets missed, preventing you from discovering costly problems months down the road.
Think of it as bringing in a neutral expert witness. Our findings are based on facts, removing the guesswork and potential conflicts of interest that slow down the claims process. A pro also spots related issues, like ensuring an exterior electrical box remains weatherproof—a small but critical detail.
Key Takeaway: A professional inspection mitigates risk for everyone. The homeowner gets a complete picture, the contractor gets a solid scope, and the carrier gets the documentation needed for a confident and fair settlement.
Navigating a Time-Sensitive Process
After a major storm, the clock is ticking. The high demand for roofers means that a full roof replacement can now take anywhere from 2 to 5 months in hard-hit areas. This bottleneck has turned the storm damage roof inspection into a time-critical first step.
Industry best practices recommend scheduling an inspection within 24-48 hours of the storm.
Waiting any longer not only risks more water damage from the next rainfall but can also complicate your claim. As research on Oklahoma storm damage statistics shows, a prompt response is essential for documenting fresh damage and, just as importantly, getting your project into the contractor’s queue.
Making the call to bring in a professional ensures your assessment is safe, accurate, and built for a successful outcome. It’s the definitive step toward turning storm chaos back into order.
Common Questions About Roof Inspections
When the storm passes, the questions start flooding in. Homeowners and insurance pros are all trying to figure out the right next steps, and fast. Getting clear answers isn't just helpful—it's crucial for making the right call when property and money are on the line.
We get these questions all the time. Here are the straight answers you need to cut through the confusion and handle your claim with confidence.
How Soon After A Storm Should I Get A Roof Inspection?
The clock starts ticking the moment the storm ends. Ideally, you want a professional on that roof within 24 to 48 hours.
Why the rush? First, you need to capture the damage while it's fresh. It's much easier to tie hail hits, granule loss, and wind-lifted shingles directly to a specific storm when you document it immediately. This creates a clean, undeniable timeline for the insurance claim.
A fast inspection also lets you jump on emergency repairs, like tarping, before a small leak turns into a massive interior water damage and mold problem. Most policies require you to prevent further damage, and a timely inspection is your first and best step. Waiting too long can create new issues that the carrier may not cover.
For temporary fixes, you can learn more by checking out our guide on applying a strong, durable sealant spray.
And on a practical note, inspectors' schedules get slammed after a major weather event. Getting in the queue early is just smart business.
Should I Trust A Free Roof Inspection Offer?
That "free" inspection offer from a roofer can be tempting, but you need to approach it with a healthy dose of skepticism.
These inspections are almost always a sales tool for contractors whose main goal is selling a full roof replacement. This creates a massive conflict of interest. Their "inspector" is really a salesperson, and their assessment might be shaped to find just enough damage to justify a new roof—which may or may not be what's truly needed.
An independent inspection partner, like Fox Claims, operates differently. Our job isn't to sell a roof; it's to provide an unbiased, third-party assessment of the roof's actual condition for everyone involved.
This independent approach means the recommended work is based on facts, not a sales quota. An unbiased report leads to a fairer, more accurate claim settlement for the homeowner, contractor, and the insurance carrier.
What Should A Professional Roof Inspection Report Contain?
A real professional report is a world away from a simple price quote. It’s a detailed, evidence-based file built to give an adjuster everything they need to approve the work with confidence. A vague summary with a few blurry photos just won't cut it.
Here’s what a comprehensive storm damage report absolutely must include:
- A Detailed Summary of Findings: A clear, direct overview of the roof's condition and the specific storm damage found.
- An Extensive Photo Log: This is the core of the report. It needs overview shots for context and dozens of labeled, close-up photos of all damage. A coin or measuring tape for scale is a must.
- Detailed Roof Diagrams: A clear diagram showing the roof's layout and marking the exact location and type of damage on every single slope. This is the roadmap of the loss.
- A Clear Narrative: The report needs to describe the roofing materials, their general condition, and specifically what damage came from the storm versus what might be old wear and tear or a manufacturing issue.
- An Unbiased Recommendation: The report should end with a clear recommendation for repair or replacement, backed entirely by the documented evidence.
This level of detail eliminates guesswork and empowers adjusters to move claims forward, resulting in fewer questions and faster approvals.
When your property is on the line, you need a partner who delivers an accurate, unbiased, and rock-solid assessment. Fox Claims Consultants LLC specializes in providing the detailed documentation and expert inspections that get claims moving. When you need boots on the ground for a complex storm damage roof inspection, contact our team to get it done right.
Leave a Reply